Register for Classes Online
Banner Self Service Student Profile & Registration User Guide
Log In
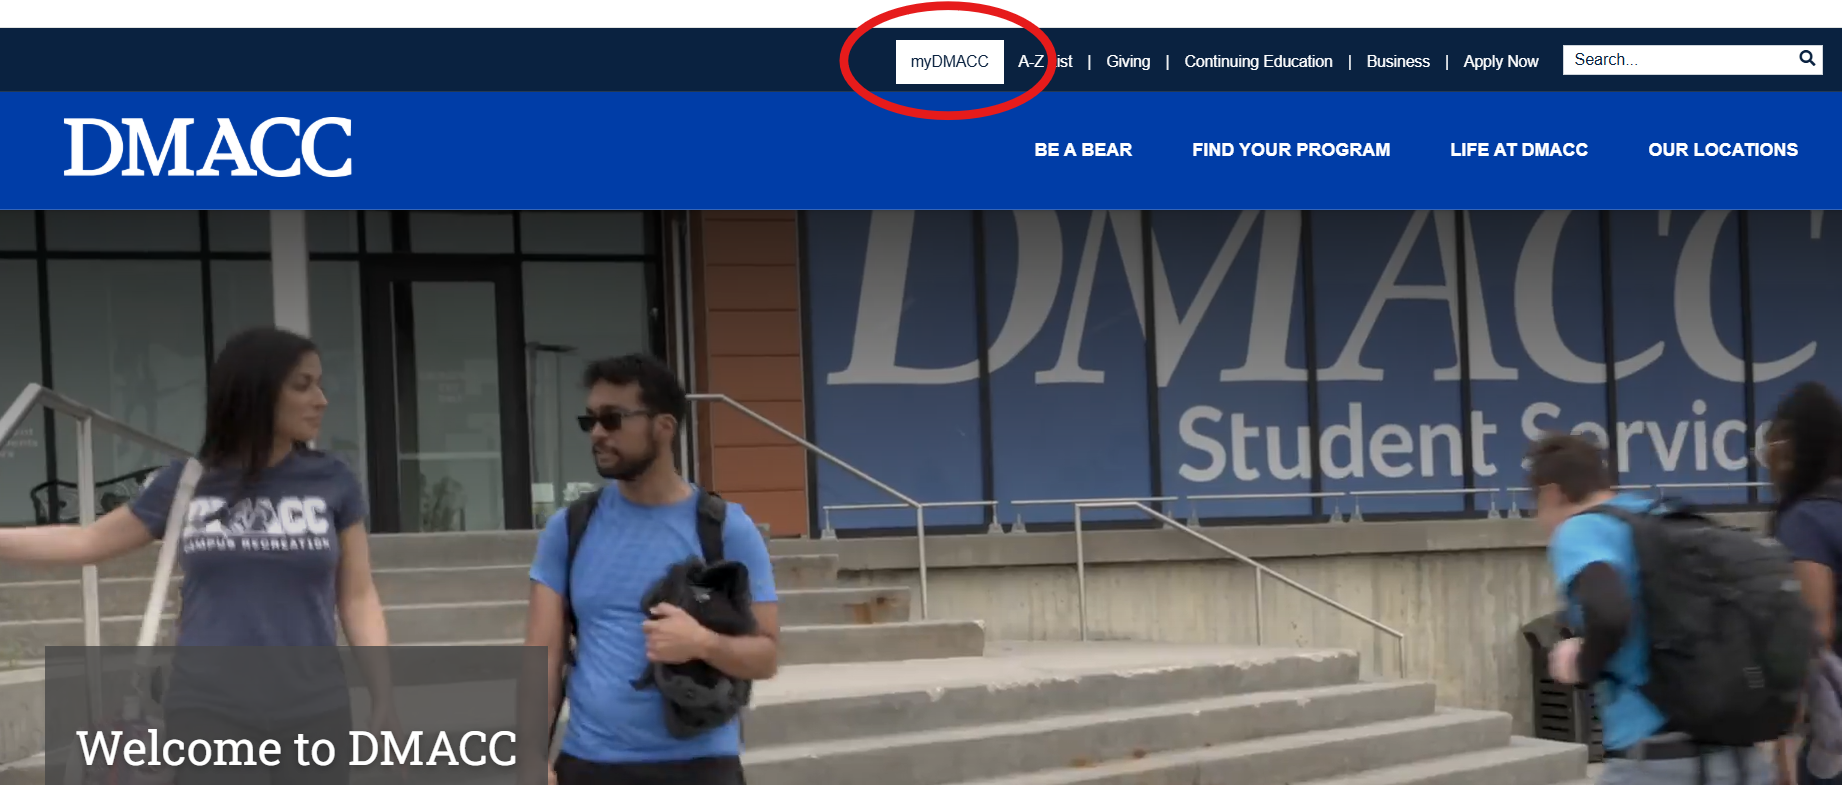
Go to the DMACC website and select myDMACC at the top of the page.
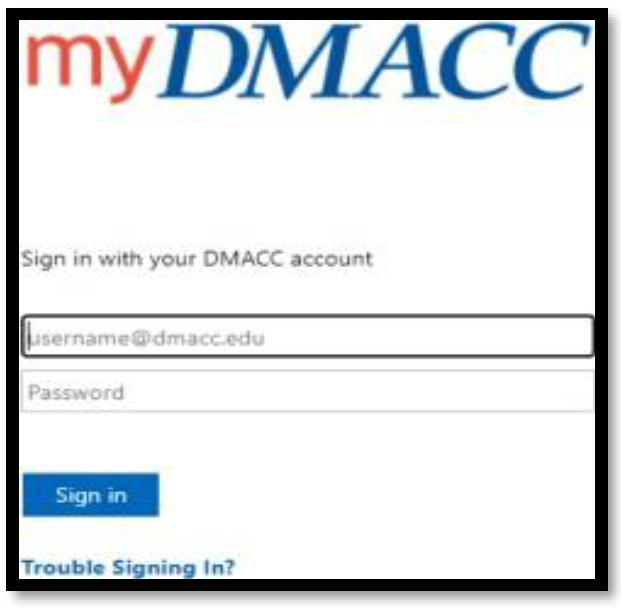
Login in using your DMACC email address and network password. Follow instructions for authentication.
Your myDMACC Dashboard has many helpful options on the left, and tiles for important links and widgets in the middle section. You can also edit your Shortcuts menu for your convenience.
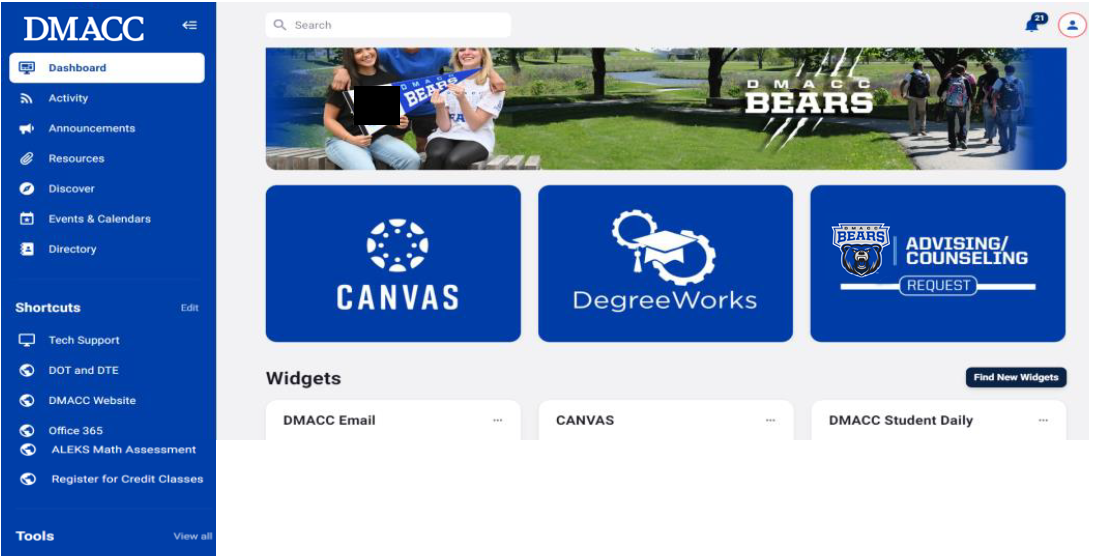
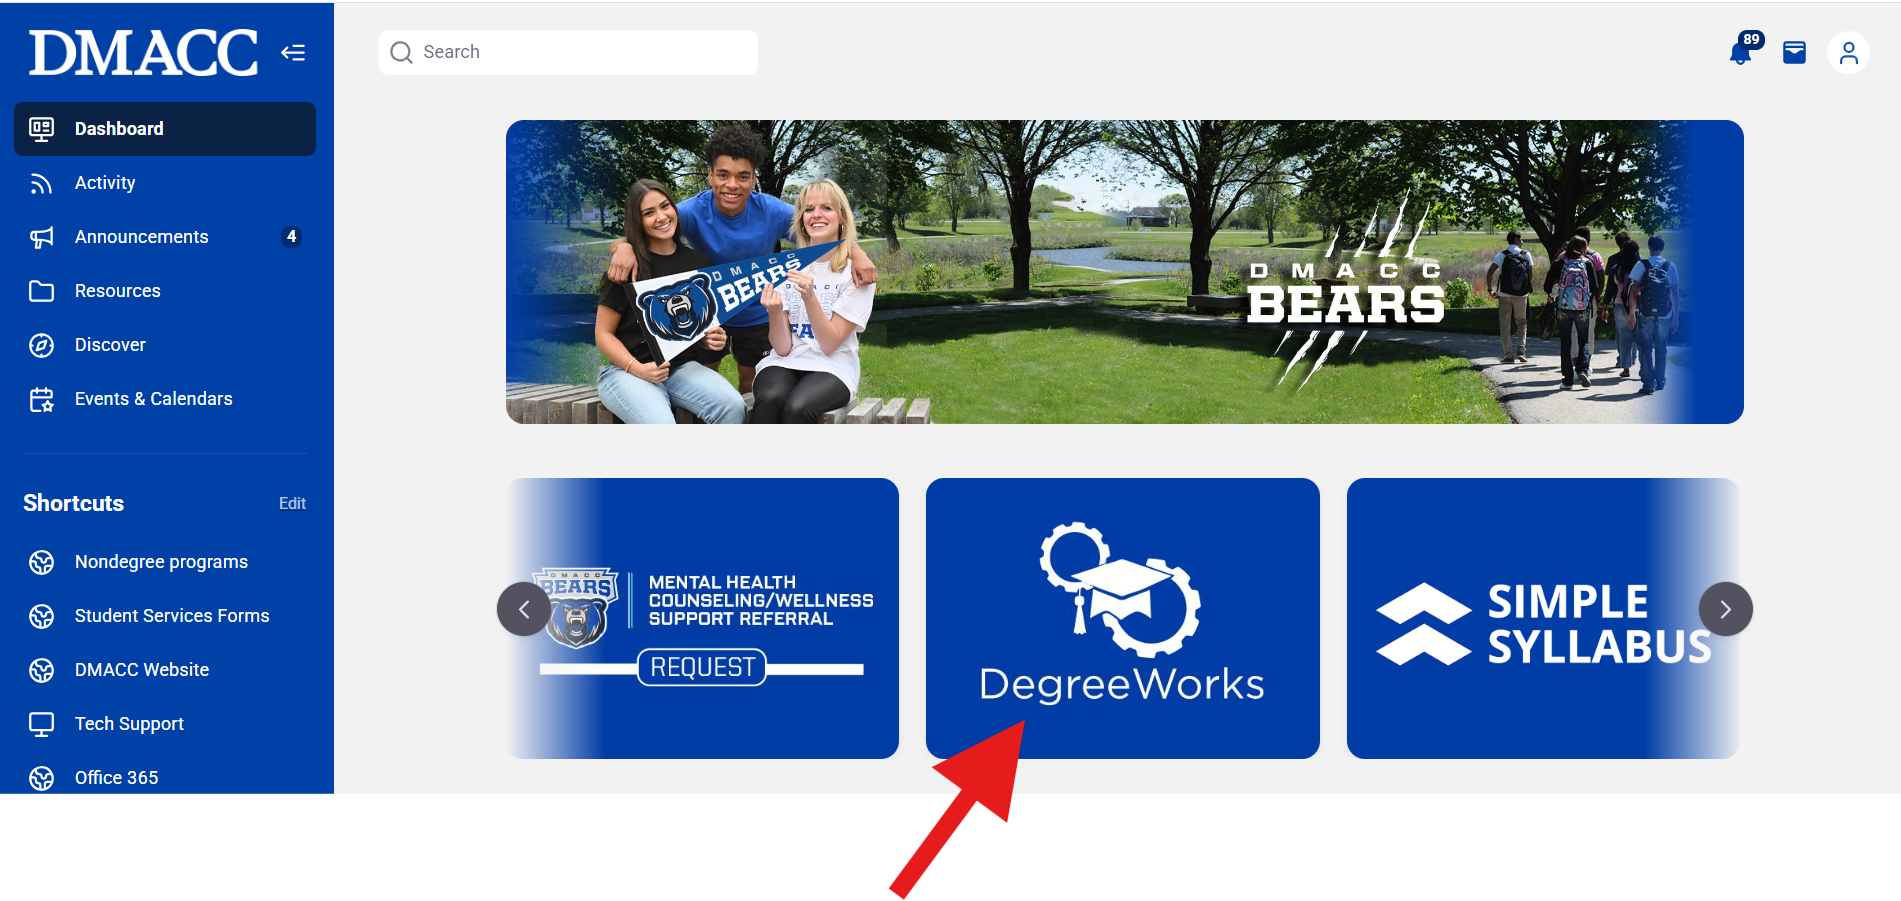
From your myDMACC Dashboard, select DegreeWorks to see what courses you still need, to satisfy requirements.
From your DegreeWorks page, view course requirements for your program of study and see if any former classes you completed at another institution* have been accepted toward your program. Example:
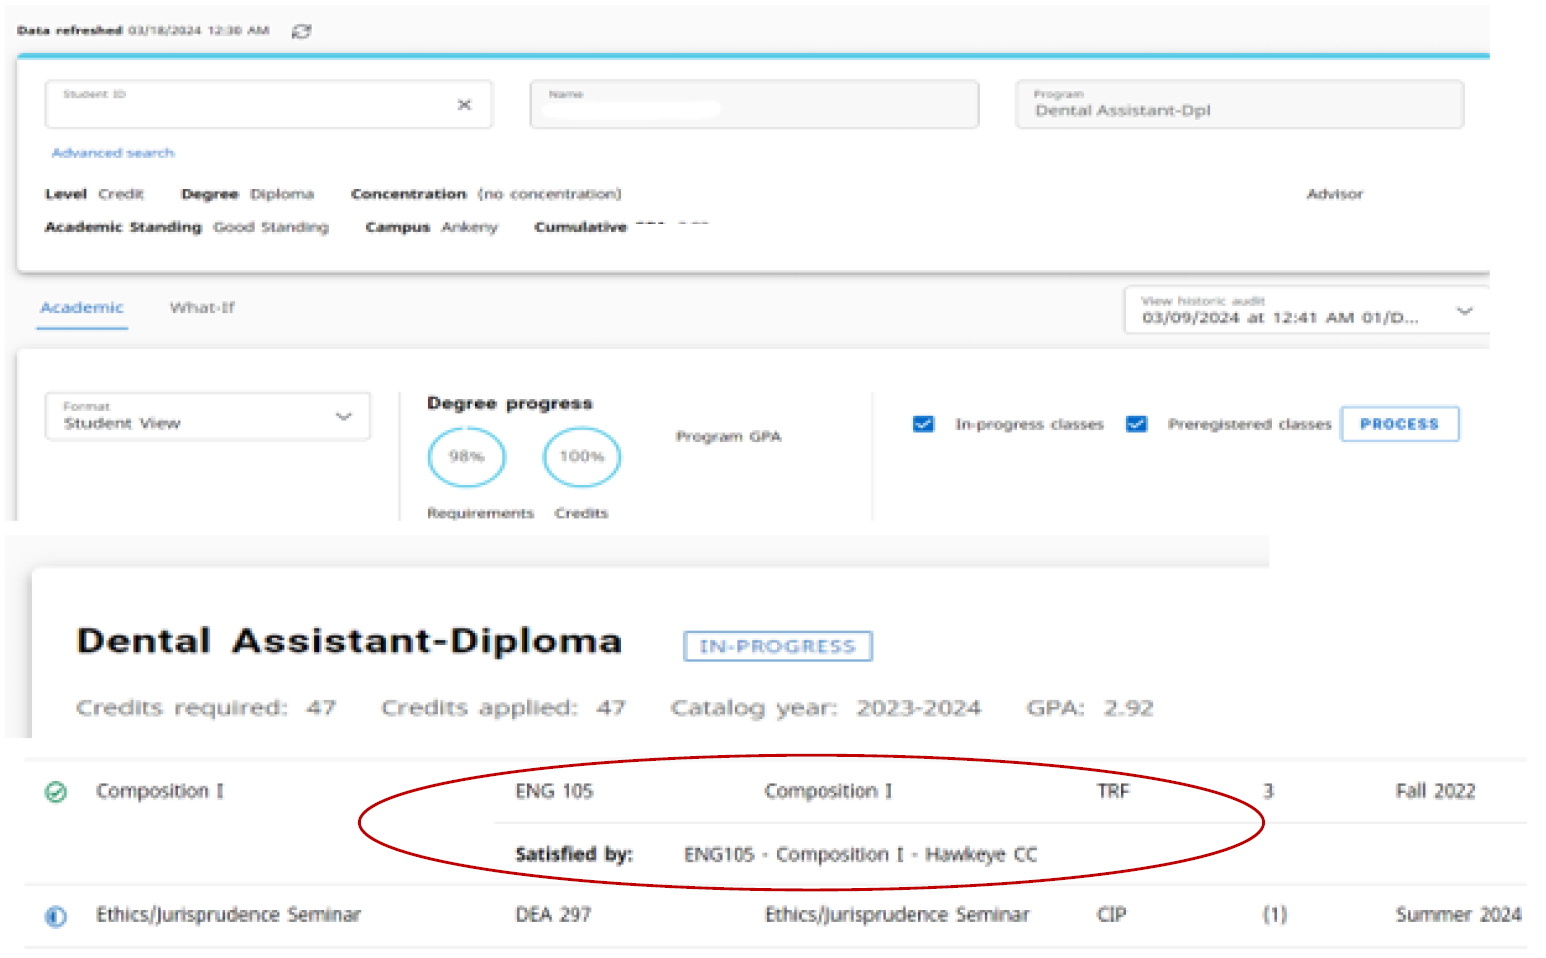
*If your transfer credit(s) have been evaluated by DMACC Credentials staff and accepted toward your program of study(admitted status), it will be shown in your DegreeWorks. Make sure you have requested your official transcript(s) from any other institution be sent to DMACC Admissions for official review - ASAP
Prepare for Registration
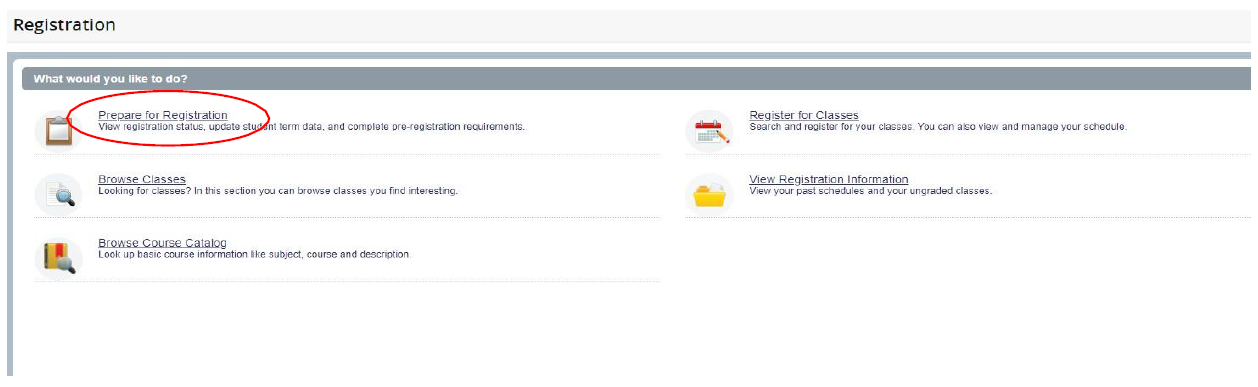
From your myDMACC Dashboard (under Tools) select Register for Credit Classes and then Prepare for Registration.
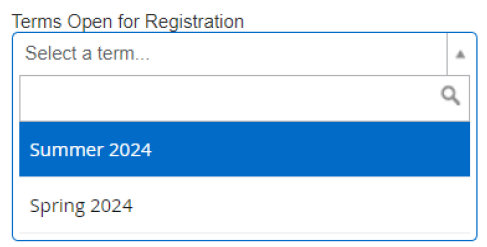
Select appropriate term for registration using the drop-down menu.
Here you will see your student registration / academic status permitting registration and/or holds that may prevent you from registering. You can also view your curriculum and your earned credit.
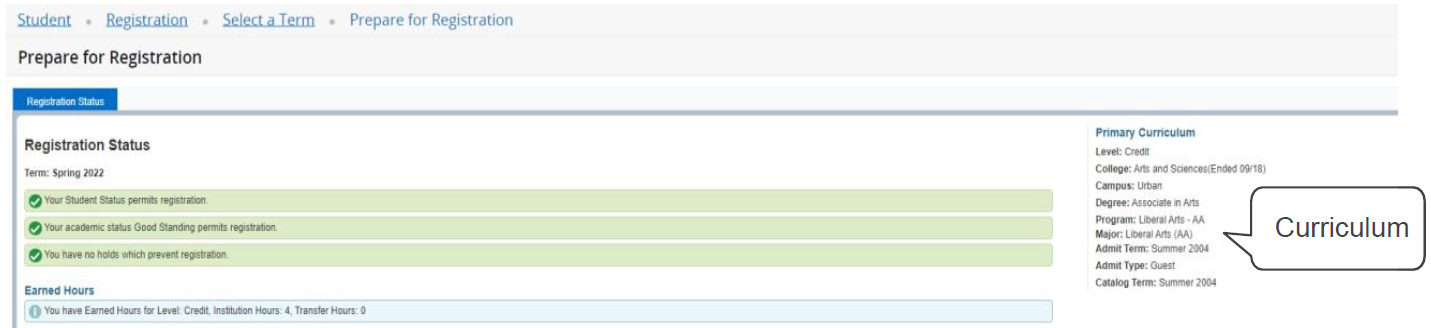
- Green indicates no holds that prevent registration
- Red indicates holds that prevent registration
- Blue indicates holds that do not prevent registration and other information
Select the Registration link near the top of the page, to register (or browse) classes.

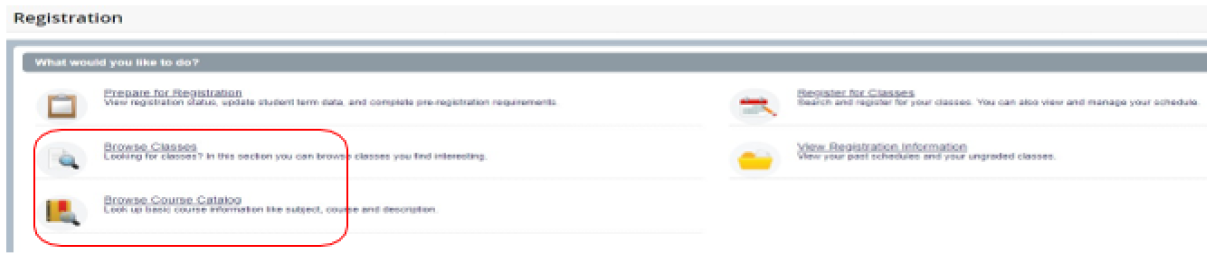
To Browse Classes/Browse Course Catalog
Use the Browse Classes link to search for classes you find interesting. Use the Browse Course Catalog link to look up information like the course subject, number, and description.
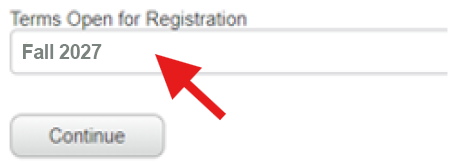
Select a Term and click Continue
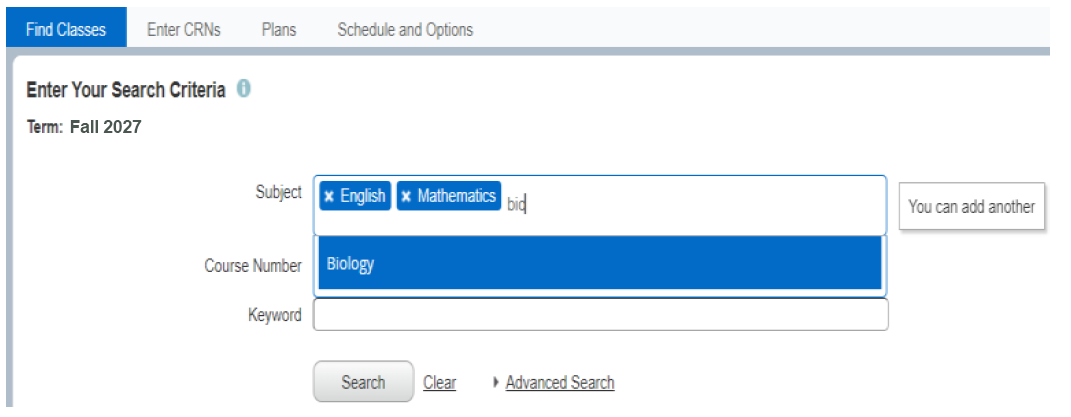
To enter course criteria, start typing the subject or the course number and click Search. You can narrow your search by type of class or campus by clicking Advanced Search.
Browse course offerings by subject, CRN, instructor, meeting times, campus, etc. You can also click the course title to view details such as course description and prerequisites.
To Register for Credit Classes
Select the Register for Classes link
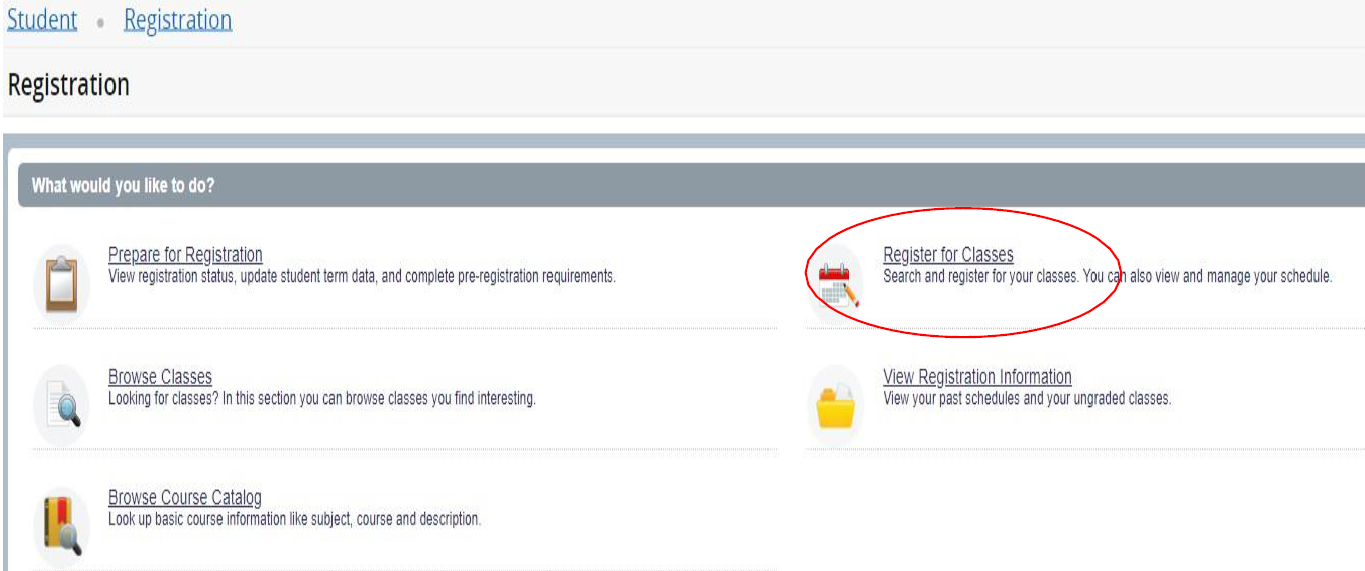
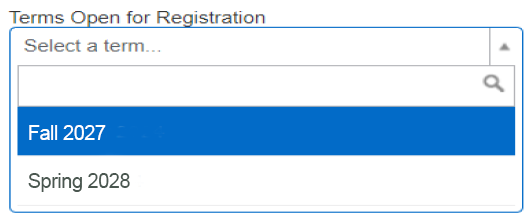
Select a Term and click Continue
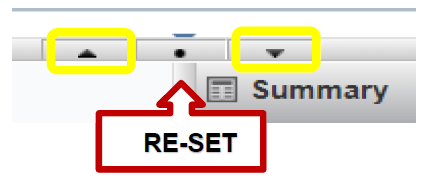 1. The Register for Classes Page has three panels: Search, Schedule, and Summary. The panels can be minimized or maximized by selecting the toggle arrows, or reset
back to default by selecting the reset button.
1. The Register for Classes Page has three panels: Search, Schedule, and Summary. The panels can be minimized or maximized by selecting the toggle arrows, or reset
back to default by selecting the reset button.
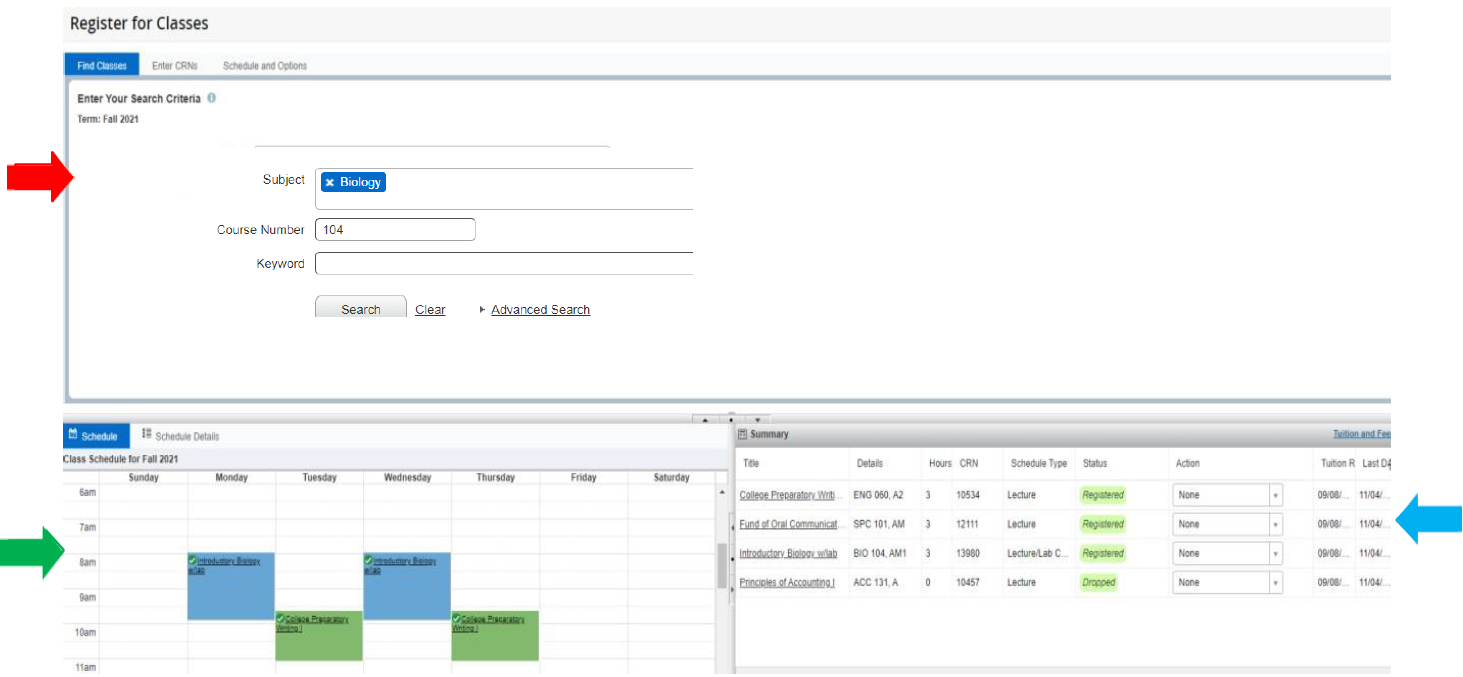
- Class Search: Click Find Classes along the top allows you to search for classes for the selected term.
- Schedule View: At the bottom left, provides a visual list of registered sections for the term. Sections will be identified by color, which allows students to view schedule conflicts, if applicable.
- Summary Section: In the bottom right is your Pending or Registered courses. If you see that a course you want is Pending, you must choose “Web Registered” (under Action) and click Submit to be officially registered.
2. To Search and Register for Classes use the Search Results panel.
- Use the Find Classes tab for basic search by subject (start typing subject), course number, or keyword in the title. Select Advanced Search for additional search features.
- Use the Enter CRN tab to enter a specific 5-digit CRN if you know it.
3. Review available classes and important details.
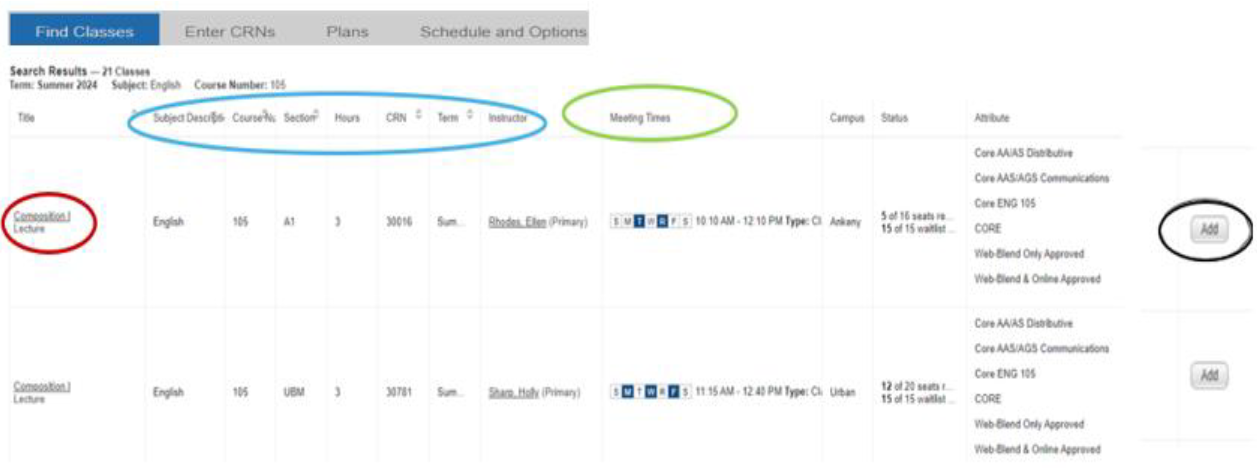
- Click the Title to view additional course details. Review: Subject, Description, Course, Section, Hours, CRN, Term, Instructor, Campus, Section Status, Attribute, and Instructional Method.
- Hover over Meeting Times (green oval below) to view days, time, and potential scheduling conflicts. Note: class meeting days are blocked in blue.
4. Click the Add button on the far right (shown below) after you have selected a course.
You will see the course in your Summary section in the lower right corner.
a. The course will initially show in your Summary section as Pending.
You have 2 options under Action (“Web Registered” or “Remove”).
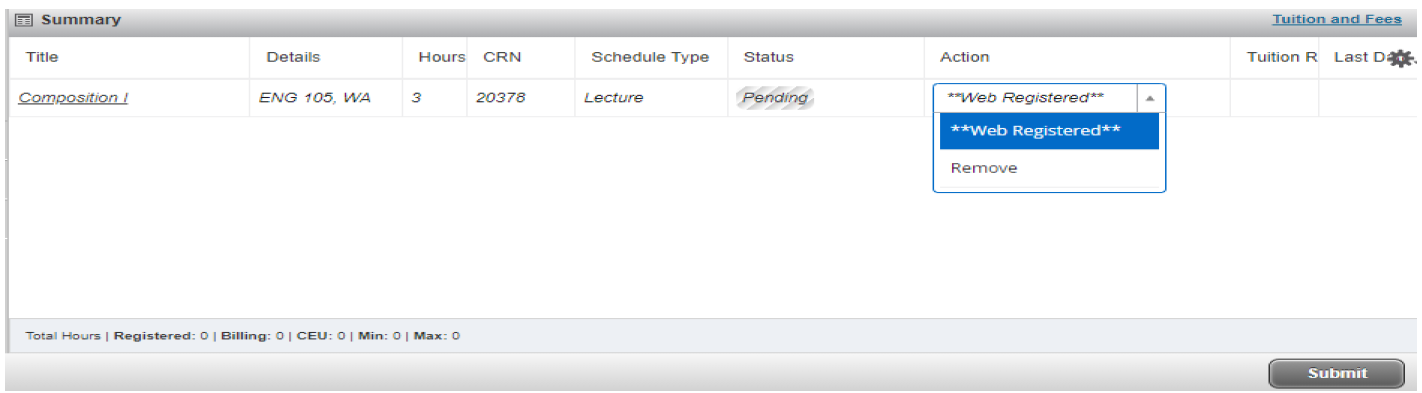
b. After you select “Web Registered” you must ALSO click Submit to complete
your registration. The class will show as Registered in green.
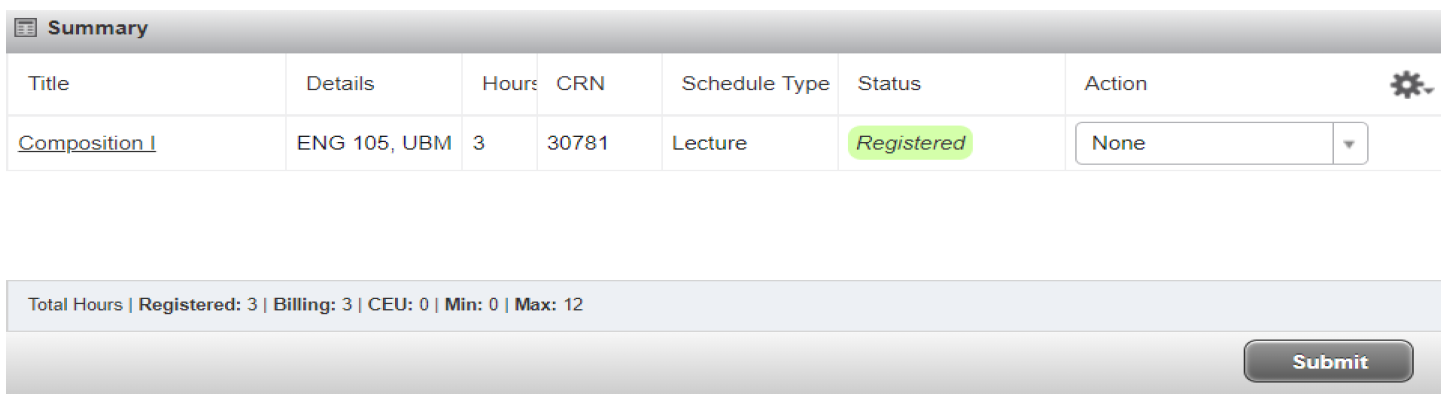
5. Registered courses are also shown in the Schedule panel in the lower left corner.
6. To add another course, click Search Again in the top right corner.
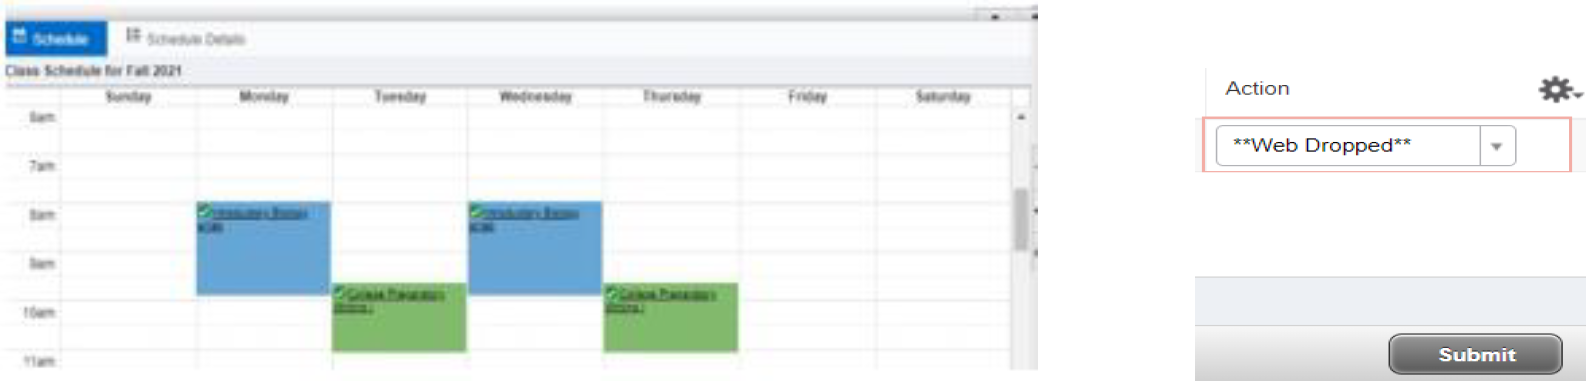
7. To drop a course, select “Web Dropped” and click Submit.
8. Use the links and tabs at the top of the page for additional navigation.

Questions?
- Email: Registration@dmacc.edu or call 515-964-6800 or 800-342-0033
- Visit the Registration links below:
Other Important Contacts For Registration
- Admissions: admissions@dmacc.edu; 515-965-7337
- DMACC Transcript: transcripts@dmacc.edu; 515-964-6396
- Drop/Add Classes: registration@dmacc.edu; 515-964-6800
- Evening Services / Express Advising: advising@dmacc.edu; 515-964-6200
- Financial Aid: finaid@dmacc.edu; 515-964-6282
- Find an Advisor
- Graduation: credentials@dmacc.edu; 515-964-6644
- Orientation: orientation@dmacc.edu; 515-965-7321
- Student Accounts: mybill@dmacc.edu; 515-964-6446
- Transcript Evaluation: credentials@dmacc.edu; 515-964-6644